ES 新特性
ECMASCript 简介
1、Javascript语言本身指的就是ECMASCript,只不过运行在不同的平台Javascript进行了扩展。
2、Javascript在Web下使用包括了:ECMASCript + Web APIs (BOM、DOM)。
3、Javascript在Node.js下使用包括了:ECMASCript + Node APIs (fs、net、etc.)。
4、2016 年开始 ES 保持每年一个版本迭代,行业内我们所说的ES6可以泛指ECMASCript的所有标准。
5、ES6对原有基础的做了很大改进,主要体现在四个方面:
- 对原有语法的增强,如:
Object.values()、Object.assign()... - 解决原有语法上的一些问题或者缺陷,如:
let、const、块作用域... - 全新的对象、全新的方法、全新的功能,如:
Proxy、Reflect、class关键词、extends类的继承... - 全新的数据类型和数据结构,如:
Symbol、Set、Map...
数组解构、对象解构
1、以往获取数组元素的方式是通过数组下标,ES6获取数组元素可以按照位置相同进行赋值,也可以添加默认值。另外通过剩余运算符可以获取集合。
const arr = [100, 200, 300];
const [foo, bar, baz, car = 400] = arr;
const [bas, ...rest] = arr;
log(foo, bar, baz, car); // 100 200 300 400
log(bas, rest); // 100 [ 200, 300 ]
const arr = [100, 200, 300];
const [foo, bar, baz, car = 400] = arr;
const [bas, ...rest] = arr;
log(foo, bar, baz, car); // 100 200 300 400
log(bas, rest); // 100 [ 200, 300 ]
2、以往获取对象属性的方式是通过.运算符,ES6可以通过变量名与属性名相同获取属性值,也可以重命名属性名,给属性值添加默认值。
const obj = { name: "Tom", age: 20 };
const name = "Jack";
const { name: objName = "default" } = obj;
log(objName); // Tom
const obj = { name: "Tom", age: 20 };
const name = "Jack";
const { name: objName = "default" } = obj;
log(objName); // Tom
模板字符串及扩展方法
1、模板字符串普通用法支持支持变量,反引号转义、换行、插值运算
const name = "peek";
log(`hello es2015
my name is ${name + 1} \`\string\``);
const name = "peek";
log(`hello es2015
my name is ${name + 1} \`\string\``);
2、带标签的模板字符串可以对字符串进行加工
const name = "peek";
const gender = true;
function myTagFunc(string, name, gender) {
    return string[0] + name + string[1] + gender + string[2];
}
const result = myTagFunc`hey, ${name} is a ${gender}`;
console.log(result); // hey, peek is a true
const name = "peek";
const gender = true;
function myTagFunc(string, name, gender) {
    return string[0] + name + string[1] + gender + string[2];
}
const result = myTagFunc`hey, ${name} is a ${gender}`;
console.log(result); // hey, peek is a true
3、ES6提供的字符串的扩展方法
const message = "Error: foo is not defined";
log(message.includes("foo")); // true
log(message.startsWith("Error")); // true
log(message.endsWith("defined")); // true
const message = "Error: foo is not defined";
log(message.includes("foo")); // true
log(message.startsWith("Error")); // true
log(message.endsWith("defined")); // true
...运算符
1、函数参数传值采用剩余运算符,最好放在形参的最后
const hello = (sum, ...rest) => {
    log(sum); // 100
    log(rest); // [ 1, 2, 3 ]
};
hello(100, 1, 2, 3);
const hello = (sum, ...rest) => {
    log(sum); // 100
    log(rest); // [ 1, 2, 3 ]
};
hello(100, 1, 2, 3);
2、数组中使用扩展运算符
const arr = ["1", "2", "3"];
console.log(...arr); // 1 2 3
const arr = ["1", "2", "3"];
console.log(...arr); // 1 2 3
Object 对象字面量增强
const x = "11";
const family = {
    x,
    y() {
        // 推荐写法,简洁
        console.log(this); // this指向family
    },
    z: () => {
        // 推荐写法,方便理解
        console.log(this.y); // this指向window
        console.log(family.y); // 调用family对象的属性
        return null;
    },
    // 计算属性名作为属性名
    [Math.random()]: "33",
};

console.log(family);
Object 对象新方法
log(Object.assign({ a: 1, b: 2 }, { a: 3, c: 4 })); // 对象合并
log(Object.assign({}, { a: 3, c: 4 })); // 浅拷贝
log(-0 === +0); // true
log(null === null); // true
log(Object.is(-0, +0)); // false 判断对象是否相等
log(Object.is(null, null)); // true
log(Object.assign({ a: 1, b: 2 }, { a: 3, c: 4 })); // 对象合并
log(Object.assign({}, { a: 3, c: 4 })); // 浅拷贝
log(-0 === +0); // true
log(null === null); // true
log(Object.is(-0, +0)); // false 判断对象是否相等
log(Object.is(null, null)); // true
Proxy 对象(俗称:门卫)
1、Proxy对象采用的是非侵入的方式劫持整个对象, 对整个对象进行监管
const person = {
    name: "Tom",
    age: 24,
};
const personProxy = new Proxy(person, {
    get(target, prop) {
        // 1、对对象属性的取值操作,添加默认值,最后返回属性值
        return target[prop] ? target[prop] : "default";
    },
    set(target, prop, value) {
        // 小知识:vscode提示的代码不是我们所需要的,按下Esc键即可
        // 2、对对象属性的赋值操作,添加校验以及异常处理
        if (prop === "age") {
            if (!Number.isInteger(value)) {
                throw new Error("this value must be a integer");
            }
        }
        // 3、给对象属性赋值
        target[prop] = value;
    },
});

personProxy.age = "20";
log(personProxy.name);
log(personProxy.xxx);
2、Proxy 与 Object.defineProperty对比 Object.defineProperty仅支持对对象的读写进行劫持,并且是侵入式写法,需要改造对象。 Proxy是对整个对象进行监管, Proxy采用非侵入的方式劫持整个对象。
const person = {
    name: "Tom",
    age: 24,
};
const personProxy = new Proxy(person, {
    set(target, prop, value) {
        target[prop] = value;
    },
    deleteProperty(target, prop) {
        console.log("delete", prop);
        delete target[prop];
    },
});

delete personProxy.age;
personProxy.gender = "man";
log(person); // { name: 'Tom', gender: 'man' }
Proxy对数组操作更友好的监视,以往都是采用重写数组的方法实现数组监听(vue2+)
const list = [];
const listProxy = new Proxy(list, {
    set(target, prop, value) {
        target[prop] = value;
        return true; // 标记数组元素添加成功
    },
});

listProxy.push("11");
log(list); // [ '11' ]
const list = [];
const listProxy = new Proxy(list, {
    set(target, prop, value) {
        target[prop] = value;
        return true; // 标记数组元素添加成功
    },
});

listProxy.push("11");
log(list); // [ '11' ]
3、除了上面常用的属性操作,还有其他的操作,如下:
Reflect 静态类
诞生的意义: Reflect静态类提供了统一的操作对象的方法。以前我们操作对象的方法很杂,比如 delete、in、Object.keys(), 未来要废弃的。
const person = {
    name: "Tom",
    age: 24,
};

log("name" in person);
log(Reflect.get(person, "name"));
log(Reflect.set(person, "name", 'link'));
// 判断一个对象是否存在某个属性,和 in 运算符 的功能完全相同。
log(Reflect.has(person, "name"));
log(delete person.name);
// 作为函数的delete操作符,相当于执行 delete target[name]
log(Reflect.deleteProperty(person, "name"));
log(Object.keys(person));
// 返回一个包含所有自身属性(不包含继承属性)的数组。(类似于 Object.keys(), 但不会受enumerable影响).
log(Reflect.ownKeys(person));

// 如果参数为 Object,返回结果相同
Object.getPrototypeOf({})   // Object.prototype
Reflect.getPrototypeOf({})  // Object.prototype
Reflect.setPrototypeOf({}, Object.prototype); // true

// 新对象是可扩展的.
var empty = {};
Reflect.isExtensible(empty); // === true
// ...但这可以改变.
Reflect.preventExtensions(empty);
Reflect.isExtensible(empty); // === false

// 与 Object.getOwnPropertyDescriptor() 的不同点
Reflect.getOwnPropertyDescriptor("foo", 0);
// 类型错误:foo并不非null对象
Object.getOwnPropertyDescriptor("foo", 0);
// { value: "f", writable: false, enumerable: true, configurable: false }

// 使用 Reflect.defineProperty()
let obj = {}
Reflect.defineProperty(obj, 'x', {value: 7})  // true
obj.x                                         // 7

// 静态方法 Reflect.ownKeys() 返回一个由目标对象自身的属性键组成的数组。
Reflect.ownKeys({z: 3, y: 2, x: 1}); // [ "z", "y", "x" ]
Reflect.ownKeys([]); // ["length"]

// 静态方法 Reflect.apply() 通过指定的参数列表发起对目标 (target) 函数的调用。
Reflect.apply(Math.floor, undefined, [1.75]);
可以改造之前的Proxy获取对象属性的方法
const personProxy = new Proxy(person, {
    get(target, prop, value) {
        log("watch ...");
        return Reflect.get(target, prop);
    },
});

console.log(personProxy.age);
const personProxy = new Proxy(person, {
    get(target, prop, value) {
        log("watch ...");
        return Reflect.get(target, prop);
    },
});

console.log(personProxy.age);
除了上面常用的属性操作,还有其他的操作,如下:
Promise 对象
略,参考手写 promise
class 关键词
诞生的意义:让Javascript类的定义, 简洁易懂。
1、以往我们定义一个类是采用构造函数的方式,如下:
function Person(value) {
    this.name = value;
}
Person.create = function (value) {
    // ES5定义类的静态方法
    return new Person(value);
};
Person.prototype.say = function () {
    log(`hi, my name is ${this.name}`);
};

// const person = new Person()
const person = Person.create("Tom");
person.say();
function Person(value) {
    this.name = value;
}
Person.create = function (value) {
    // ES5定义类的静态方法
    return new Person(value);
};
Person.prototype.say = function () {
    log(`hi, my name is ${this.name}`);
};

// const person = new Person()
const person = Person.create("Tom");
person.say();
2、现在我们采用 class 关键词定义类, 简洁易懂
class Person {
    constructor(value) {
        this.name = value;
    }
    say() {
        log(`hi, my name is ${this.name}`);
    }
    static create(value) {
        // ES6定义类的静态方法
        return new Person(value);
    }
}

// const person = new Person('Tom')
const person = Person.create("Tom");
person.say();
extends 类的继承
诞生的意义:让类的继承更加简洁易懂。
class Person {
    constructor(value) {
        this.name = value;
    }
    say() {
        log(`hi, my name is ${this.name}`);
    }
}

class Student extends Person {
    constructor(name, number) {
        super(name); // super对象始终指向父类,调用它即调用父类构造函数
        this.number = number;
    }
    hello() {
        super.say();
        log(`my school number is ${this.number}`);
    }
}

// extends实现类的继承,相比于ES5中原型继承,更简洁易懂
const student = new Student("jack", 101);
console.log(student.hello());
Set 数据结构
诞生的意义:Set 对象允许你存储任何类型的唯一值,无论是原始值或者是对象引用。
const list = new Set(); // 数据集合中的元素不存在重复
list.add(1).add(2).add(2).add(4); // add方法会返回集合本身,因此可以链式调用

for (i of list) {
    log(i);
}

log(list.delete(4));
log(list.size);
log(list.has(4));
// 常用的场景是数组去重
const arr = [1, 1, 4, 4, 5, 6];
log(Array.from(new Set(arr)));
log([...new Set(arr)]);
const list = new Set(); // 数据集合中的元素不存在重复
list.add(1).add(2).add(2).add(4); // add方法会返回集合本身,因此可以链式调用

for (i of list) {
    log(i);
}

log(list.delete(4));
log(list.size);
log(list.has(4));
// 常用的场景是数组去重
const arr = [1, 1, 4, 4, 5, 6];
log(Array.from(new Set(arr)));
log([...new Set(arr)]);
Map 数据结构
诞生的意义:严格意义上的键值对的集合,可以以任意数据类型作为键。
1、以往以多种数据类型作为键值的对象
const obj1 = {
    [123]: "123",
    [true]: "true",
    [{ a: 1 }]: "a",
    [{ b: 1 }]: "b",
};

log(Object.keys(obj1)); // [ '123', 'true', '[object Object]' ]
log(obj1["[object Object]"]); // b
const obj1 = {
    [123]: "123",
    [true]: "true",
    [{ a: 1 }]: "a",
    [{ b: 1 }]: "b",
};

log(Object.keys(obj1)); // [ '123', 'true', '[object Object]' ]
log(obj1["[object Object]"]); // b
问题:键值默认被Object.prototype.toString.call(key) 转为字符串
2、ES6键值对的集合定义
const obj2 = new Map();
const tom = { name: "tom" };

obj2.set(tom, "c");
log(obj2); // Map(1) {{…} => 'c'}
obj2.forEach((value, key) => log(value, key)); // {name: 'tom'}
log(obj2.get(tom)); // c
log(obj2.has(tom)); // true
log(obj2.delete(tom)); // true
log(obj2.clear()); // undefined
const obj2 = new Map();
const tom = { name: "tom" };

obj2.set(tom, "c");
log(obj2); // Map(1) {{…} => 'c'}
obj2.forEach((value, key) => log(value, key)); // {name: 'tom'}
log(obj2.get(tom)); // c
log(obj2.has(tom)); // true
log(obj2.delete(tom)); // true
log(obj2.clear()); // undefined
Symbol 基本数据类型
1、以往当不同文件重复定义全局对象的同一个属性出现覆盖问题,以下模拟不同文件。
const cache = {};
/* -----------------a.js--------------------- */
cache["foo"] = "111";

/* ----------------b.js--------------------- */
cache["foo"] = "222";
log(cache); // { foo: '222' }
const cache = {};
/* -----------------a.js--------------------- */
cache["foo"] = "111";

/* ----------------b.js--------------------- */
cache["foo"] = "222";
log(cache); // { foo: '222' }
2、Symbol 类型可以定义常量,并添加对 Symbol 数据的描述
const s = Symbol("foo");
log(typeof s); // Symbol
log(Symbol("foo")); // Symbol(foo) 添加对Symbol数据的描述
log(Symbol("bar"));
log(Symbol("fpp"));
const s = Symbol("foo");
log(typeof s); // Symbol
log(Symbol("foo")); // Symbol(foo) 添加对Symbol数据的描述
log(Symbol("bar"));
log(Symbol("fpp"));
3、定义对象的私有属性,以前都是约定的如:_name : 'Tom',不可靠
const name = Symbol("name");
const person = {
    [name]: "Tom", // 3、定义对象的私有属性,以前都是约定的如:_name : 'Tom'
    say() {
        log(`${this[name]}`);
    },
};
log(person.name); // undefined
log(person.say()); // Tom
const name = Symbol("name");
const person = {
    [name]: "Tom", // 3、定义对象的私有属性,以前都是约定的如:_name : 'Tom'
    say() {
        log(`${this[name]}`);
    },
};
log(person.name); // undefined
log(person.say()); // Tom
Symbol类型的数据最主要的作用就是为对象添加一个独一无二的属性名
4、Symbol 类型的比较
log(Symbol() === Symbol(), Symbol("foo") === Symbol("foo")); // false false
// Symbol内部维护了一个描述符到Symbol的映射表
log(Symbol.for("foo") === Symbol.for("foo")); // true
// Symbol.for()内部调用了toString()方法
log(Symbol.for(true) === Symbol.for("true")); // true
log(Symbol() === Symbol(), Symbol("foo") === Symbol("foo")); // false false
// Symbol内部维护了一个描述符到Symbol的映射表
log(Symbol.for("foo") === Symbol.for("foo")); // true
// Symbol.for()内部调用了toString()方法
log(Symbol.for(true) === Symbol.for("true")); // true
5、Symbol()属性更适合作为对象的私有属性
const obj1 = {
    [Symbol()]: "Symbol value",
    [Symbol()]: "Symbol value",
    foo: "value",
};
for (key in obj1) {
    // foo
    log(key);
}
log(Object.keys(obj1)); // [ 'foo' ]
log(JSON.stringify(obj1)); // {"foo":"value"}

// 获取对象所有Symbol类型的键值
log(Object.getOwnPropertySymbols(obj1)); // [ Symbol(), Symbol() ]
for...in 、Object.keys()、JSON.stringify() 等都获取不了 Symbol 类型的属性,也反证 Symbol 类型更适合作为对象的私有属性。
ES6 可迭代接口
诞生意义:理论上for...of可以遍历任何一种数据结构(数组、伪数组、Set、Map、等)
1、JavaScript中的循环遍历
const list1 = [1, 2, 3, 4, 5];
// const list1 = new Set([1, 2, 3, 4, 5])
for (const value of list1) {
    log(value);
    if (value > 2) {
        break;
    }
}

// list1.some()
// list1.every()

const list2 = new Map();
list2.set({ a: 1 }, 1);
list2.set({ b: 2 }, 2);
for (const [key, value] of list2) {
    log(key, value);
}
2、对比forEach和for...of
list2.forEach((item) => log(item)); // 不能跳出循环
list2.forEach((item) => log(item)); // 不能跳出循环
3、数据接口含有可迭代接口--Symbol(Symbol.iterator)
// const arr = [1, 2, 3, 4]
const arr = new Set([1, 2, 3, 4]);
log(arr[Symbol.iterator]); // [Function: values]  数组原型对象上定义了可迭代函数,返回对象
log(arr[Symbol.iterator]().next()); // { value: 1, done: false }  调用对象的next() 方法
// const arr = [1, 2, 3, 4]
const arr = new Set([1, 2, 3, 4]);
log(arr[Symbol.iterator]); // [Function: values]  数组原型对象上定义了可迭代函数,返回对象
log(arr[Symbol.iterator]().next()); // { value: 1, done: false }  调用对象的next() 方法
4、如何实现对象的可迭代接口,采用迭代器模式(设计模式)
const obj2 = {
    study: ["吃饭", "睡觉", "大豆豆"],
    life: ["出行", "旅游", "美食"],
    work: ["摸鱼"],
    [Symbol.iterator]() {
        const list = Object.entries(obj2);
        let index = 0;
        return {
            next() {
                return { value: list[index], done: index++ >= list.length };
            },
        };
    },
};
// 通过自定义对象的[Symbol.iterator],实现了对象的可迭代接口,就可使用for...of
for (const [key, value] of obj2) {
    log(key, value);
}
ES6 生成器
1、一般使用
function* fn() {
    log("111...");
    yield 100;
    log("222...");
    yield 200;
}

const result = fn();
log(result.next()); // 111... 返回 { value: 100, done: false }
log(result.next()); // 222... 返回 { value: 200, done: false }
log(result.next()); // 返回 { value: undefined, done: true }
function* fn() {
    log("111...");
    yield 100;
    log("222...");
    yield 200;
}

const result = fn();
log(result.next()); // 111... 返回 { value: 100, done: false }
log(result.next()); // 222... 返回 { value: 200, done: false }
log(result.next()); // 返回 { value: undefined, done: true }
2、场景需求:实现一个发号器
function* createIdMaker() {
    let id = 1;
    while (true) {
        yield id++;
    }
}

const maker = createIdMaker();
log(maker.next().value); // 依次递增
log(maker.next().value);
log(maker.next().value);
function* createIdMaker() {
    let id = 1;
    while (true) {
        yield id++;
    }
}

const maker = createIdMaker();
log(maker.next().value); // 依次递增
log(maker.next().value);
log(maker.next().value);
3、如何实现对象的可迭代接口,采用生成器
const obj2 = {
    study: ["吃饭", "睡觉", "大豆豆"],
    life: ["出行", "旅游", "美食"],
    work: ["摸鱼"],
    [Symbol.iterator]: function* () {
        const list = Object.entries(obj2);
        for (const item of list) {
            yield item;
        }
    },
};

for (const item of obj2) {
    log(item);
}
const obj2 = {
    study: ["吃饭", "睡觉", "大豆豆"],
    life: ["出行", "旅游", "美食"],
    work: ["摸鱼"],
    [Symbol.iterator]: function* () {
        const list = Object.entries(obj2);
        for (const item of list) {
            yield item;
        }
    },
};

for (const item of obj2) {
    log(item);
}
Object 新增 API
1、Object.values()、Object.entries()、Object.getOwnPropertyDescriptors
const p1 = {
    firsetName: "Yon",
    lastName: "zhang",
    get fullName() {
        return this.firsetName + " " + this.lastName;
    },
};

log(Object.values(p1)); // [ 'Yon', 'zhang', 'Yon zhang' ]  获取对象属性值的集合
log(Object.entries(p1)); //  获取对象属性与值的集合

const descriptors = Object.getOwnPropertyDescriptors(p1);
log(descriptors);
const p2 = Object.defineProperties({}, descriptors);
p2.firsetName = "ton";
log(p2.fullName);
字符串的扩展方法
padEnd()和padStart()
const books = {
    html: 3,
    css: 10,
    javaScript: 103,
};

for (const [key, value] of Object.entries(books)) {
    log(`${key.padEnd(16, "-")} | ${value.toString().padStart(3, "0")}`);
}
// html------------ | 003
// css------------- | 010
// javaScript------ | 103
const books = {
    html: 3,
    css: 10,
    javaScript: 103,
};

for (const [key, value] of Object.entries(books)) {
    log(`${key.padEnd(16, "-")} | ${value.toString().padStart(3, "0")}`);
}
// html------------ | 003
// css------------- | 010
// javaScript------ | 103
指数操作符
在 ES7 中引入了指数运算符**,**具有与 Math.pow(..)等效的计算结果。
使用自定义的递归函数 calculateExponent 或者 Math.pow()或者指数运算符**进行指数运算。
function calculateExponent(base, exponent) {
    if (exponent === 1) {
        return base;
    } else {
        return base * calculateExponent(base, exponent - 1);
    }
}

console.log(calculateExponent(2, 10)); // 输出1024
console.log(Math.pow(2, 10)); // 输出1024
console.log(2 ** 10); // 输出1024
function calculateExponent(base, exponent) {
    if (exponent === 1) {
        return base;
    } else {
        return base * calculateExponent(base, exponent - 1);
    }
}

console.log(calculateExponent(2, 10)); // 输出1024
console.log(Math.pow(2, 10)); // 输出1024
console.log(2 ** 10); // 输出1024
SharedArrayBuffer 对象
SharedArrayBuffer 对象用来表示一个通用的,固定长度的原始二进制数据缓冲区,类似于 ArrayBuffer 对象,它们都可以用来在共享内存(shared memory)上创建视图。与 ArrayBuffer 不同的是,SharedArrayBuffer 不能被分离。
/**
 *
 * @param {*} length 所创建的数组缓冲区的大小,以字节(byte)为单位。
 * @returns {SharedArrayBuffer} 一个大小指定的新 SharedArrayBuffer 对象。其内容被初始化为 0。
 */
new SharedArrayBuffer(length);
/**
 *
 * @param {*} length 所创建的数组缓冲区的大小,以字节(byte)为单位。
 * @returns {SharedArrayBuffer} 一个大小指定的新 SharedArrayBuffer 对象。其内容被初始化为 0。
 */
new SharedArrayBuffer(length);
Atomics 对象
Atomics 对象提供了一组静态方法用来对 SharedArrayBuffer 对象进行原子操作。
这些原子操作属于 Atomics 模块。与一般的全局对象不同,Atomics 不是构造函数,因此不能使用 new 操作符调用,也不能将其当作函数直接调用。Atomics 的所有属性和方法都是静态的(与 Math 对象一样)。
多个共享内存的线程能够同时读写同一位置上的数据。原子操作会确保正在读或写的数据的值是符合预期的,即下一个原子操作一定会在上一个原子操作结束后才会开始,其操作过程不会中断。 Atomics.add() 将指定位置上的数组元素与给定的值相加,并返回相加前该元素的值。
Atomics.and() 将指定位置上的数组元素与给定的值相与,并返回与操作前该元素的值。
Atomics.compareExchange() 如果数组中指定的元素与给定的值相等,则将其更新为新的值,并返回该元素原先的值。
Atomics.exchange() 将数组中指定的元素更新为给定的值,并返回该元素更新前的值。
Atomics.load() 返回数组中指定元素的值。
Atomics.or() 将指定位置上的数组元素与给定的值相或,并返回或操作前该元素的值。
Atomics.store() 将数组中指定的元素设置为给定的值,并返回该值。
Atomics.sub() 将指定位置上的数组元素与给定的值相减,并返回相减前该元素的值。
Atomics.xor() 将指定位置上的数组元素与给定的值相异或,并返回异或操作前该元素的值。
wait() 和 wake() 方法采用的是 Linux 上的 futexes 模型(fast user-space mutex,快速用户空间互斥量),可以让进程一直等待直到某个特定的条件为真,主要用于实现阻塞。
Atomics.wait() 检测数组中某个指定位置上的值是否仍然是给定值,是则保持挂起直到被唤醒或超时。返回值为 "ok"、"not-equal" 或 "time-out"。调用时,如果当前线程不允许阻塞,则会抛出异常(大多数浏览器都不允许在主线程中调用 wait())。
Atomics.wake() 唤醒等待队列中正在数组指定位置的元素上等待的线程。返回值为成功唤醒的线程数量。
Atomics.isLockFree(size) 可以用来检测当前系统是否支持硬件级的原子操作。对于指定大小的数组,如果当前系统支持硬件级的原子操作,则返回 true;否则就意味着对于该数组,Atomics 对象中的各原子操作都只能用锁来实现。此函数面向的是技术专家。
异步迭代(ES9-2018)
在 async/await 的某些时刻,你可能尝试在同步循环中调用异步函数。例如:
async function process(array) {
    for (let i of array) {
        await doSomething(i);
    }
}
async function process(array) {
    for (let i of array) {
        await doSomething(i);
    }
}
这段代码不会正常运行,下面这段同样也不会
async function process(array) {
    array.forEach(async (i) => {
        await doSomething(i);
    });
}
async function process(array) {
    array.forEach(async (i) => {
        await doSomething(i);
    });
}
这段代码中,循环本身依旧保持同步,并在在内部异步函数之前全部调用完成。
ES2018 引入异步迭代器(asynchronous iterators),这就像常规迭代器,除了 next()方法返回一个 Promise。因此 await 可以和 for...of 循环一起使用,以串行的方式运行异步操作。例如:
async function process(array) {
    for await (let i of array) {
        doSomething(i);
    }
}
async function process(array) {
    for await (let i of array) {
        doSomething(i);
    }
}
正则表达式命名捕获组(ES9)
JavaScript 正则表达式可以返回一个匹配的对象——一个包含匹配字符串的类数组,例如:以 YYYY-MM-DD 的格式解析日期:
const reDate = /([0-9]{4})-([0-9]{2})-([0-9]{2})/,
    match = reDate.exec("2018-04-30"),
    year = match[1], // 2018
    month = match[2], // 04
    day = match[3]; // 30
const reDate = /([0-9]{4})-([0-9]{2})-([0-9]{2})/,
    match = reDate.exec("2018-04-30"),
    year = match[1], // 2018
    month = match[2], // 04
    day = match[3]; // 30
这样的代码很难读懂,并且改变正则表达式的结构有可能改变匹配对象的索引。
ES2018 允许命名捕获组使用符号,在打开捕获括号(后立即命名,示例如下:
const reDate = /(?<year>[0-9]{4})-(?<month>[0-9]{2})-(?<day>[0-9]{2})/,
    match = reDate.exec("2018-04-30"),
    year = match.groups.year, // 2018
    month = match.groups.month, // 04
    day = match.groups.day; // 30
const reDate = /(?<year>[0-9]{4})-(?<month>[0-9]{2})-(?<day>[0-9]{2})/,
    match = reDate.exec("2018-04-30"),
    year = match.groups.year, // 2018
    month = match.groups.month, // 04
    day = match.groups.day; // 30
任何匹配失败的命名组都将返回 undefined。
命名捕获也可以使用在 replace()方法中。例如将日期转换为美国的 MM-DD-YYYY 格式:
const reDate = /(?<year>[0-9]{4})-(?<month>[0-9]{2})-(?<day>[0-9]{2})/,
    d = "2018-04-30",
    usDate = d.replace(reDate, "$<month>-$<day>-$<year>");
const reDate = /(?<year>[0-9]{4})-(?<month>[0-9]{2})-(?<day>[0-9]{2})/,
    d = "2018-04-30",
    usDate = d.replace(reDate, "$<month>-$<day>-$<year>");
正则表达式
(?=pattern): 正向先行断言。 目前 JavaScript 在正则表达式中支持先行断言(lookahead)。这意味着匹配会发生,但不会有任何捕获,并且断言没有包含在整个匹配字段中。例如从价格中捕获货币符号:
const reLookahead = /\D(?=\d+)/,
    match = reLookahead.exec("$123.89");

console.log(match[0]); // $
const reLookahead = /\D(?=\d+)/,
    match = reLookahead.exec("$123.89");

console.log(match[0]); // $
(?<=pattern) : 零宽正向后行断言 ES2018 引入以相同方式工作但是匹配前面的反向断言(lookbehind),这样我就可以忽略货币符号,单纯的捕获价格的数字
const reLookbehind = /(?<=\D)\d+/,
    match = reLookbehind.exec("$123.89");

console.log(match[0]); // 123
const reLookbehind = /(?<=\D)\d+/,
    match = reLookbehind.exec("$123.89");

console.log(match[0]); // 123
(?<!pattern) : 零宽负向后行断言 以上是 肯定反向断言,非数字\D 必须存在。同样的,还存在 否定反向断言,表示一个值必须不存在,例如:
const reLookbehindNeg = /(?<!\D)\d+/,
    match = reLookbehind.exec("$123.89");

console.log(match[0]); // 123
const reLookbehindNeg = /(?<!\D)\d+/,
    match = reLookbehind.exec("$123.89");

console.log(match[0]); // 123
行分隔符、段分隔符
行分隔符(U + 2028)和段分隔符(U + 2029)符号现在允许在字符串文字中,与 JSON 匹配。
以前,这些符号在字符串文字中被视为行终止符,因此使用它们会导致 SyntaxError 异常。
Array 的 flat()方法和 flatMap()
flat()和 flatMap()本质上就是是归纳(reduce) 与 合并(concat)的操作。
Array.prototype.flat()。flat() 方法会按照一个可指定的深度递归遍历数组,并将所有元素与遍历到的子数组中的元素合并为一个新数组返回。
- flat()方法最基本的作用就是数组降维
var arr1 = [1, 2, [3, 4]];
arr1.flat();
// [1, 2, 3, 4]

var arr2 = [1, 2, [3, 4, [5, 6]]];
arr2.flat();
// [1, 2, 3, 4, [5, 6]]

var arr3 = [1, 2, [3, 4, [5, 6]]];
arr3.flat(2);
// [1, 2, 3, 4, 5, 6]

//使用 Infinity 作为深度,展开任意深度的嵌套数组
arr3.flat(Infinity);
// [1, 2, 3, 4, 5, 6]
var arr1 = [1, 2, [3, 4]];
arr1.flat();
// [1, 2, 3, 4]

var arr2 = [1, 2, [3, 4, [5, 6]]];
arr2.flat();
// [1, 2, 3, 4, [5, 6]]

var arr3 = [1, 2, [3, 4, [5, 6]]];
arr3.flat(2);
// [1, 2, 3, 4, 5, 6]

//使用 Infinity 作为深度,展开任意深度的嵌套数组
arr3.flat(Infinity);
// [1, 2, 3, 4, 5, 6]
- 其次,还可以利用 flat()方法的特性来去除数组的空项
var arr4 = [1, 2, , 4, 5];
arr4.flat();
// [1, 2, 4, 5]
var arr4 = [1, 2, , 4, 5];
arr4.flat();
// [1, 2, 4, 5]
Array.prototype.flatMap()。flatMap() 方法首先使用映射函数映射每个元素,然后将结果压缩成一个新数组。它与 map 和 深度值 1 的 flat 几乎相同,但 flatMap 通常在合并成一种方法的效率稍微高一些。 这里我们拿 map 方法与 flatMap 方法做一个比较。
var arr1 = [1, 2, 3, 4];

arr1.map((x) => [x * 2]);
// [[2], [4], [6], [8]]

arr1.flatMap((x) => [x * 2]);
// [2, 4, 6, 8]

// 只会将 flatMap 中的函数返回的数组 “压平” 一层
arr1.flatMap((x) => [[x * 2]]);
// [[2], [4], [6], [8]]
var arr1 = [1, 2, 3, 4];

arr1.map((x) => [x * 2]);
// [[2], [4], [6], [8]]

arr1.flatMap((x) => [x * 2]);
// [2, 4, 6, 8]

// 只会将 flatMap 中的函数返回的数组 “压平” 一层
arr1.flatMap((x) => [[x * 2]]);
// [[2], [4], [6], [8]]
String 的 trimStart()方法和 trimEnd()方法
新增的这两个方法很好理解,分别去除字符串首尾空白字符,这里就不用例子说声明了
Object.fromEntries()
Object.entries()方法的作用是返回一个给定对象自身可枚举属性的键值对数组,其排列与使用 for...in 循环遍历该对象时返回的顺序一致(区别在于 for-in 循环也枚举原型链中的属性)。
Object.fromEntries() 则是 Object.entries() 的反转
Object.fromEntries() 函数传入一个键值对的列表,并返回一个带有这些键值对的新对象。这个迭代参数应该是一个能够实现@iterator 方法的的对象,返回一个迭代器对象。它生成一个具有两个元素的类似数组的对象,第一个元素是将用作属性键的值,第二个元素是与该属性键关联的值。
- 通过 Object.fromEntries, 可以将 Map 转化为 Object:
const map = new Map([
    ["foo", "bar"],
    ["baz", 42],
]);
const obj = Object.fromEntries(map);
console.log(obj); // { foo: "bar", baz: 42 }
const map = new Map([
    ["foo", "bar"],
    ["baz", 42],
]);
const obj = Object.fromEntries(map);
console.log(obj); // { foo: "bar", baz: 42 }
- 通过 Object.fromEntries, 可以将 Array 转化为 Object:
const arr = [
    ["0", "a"],
    ["1", "b"],
    ["2", "c"],
];
const obj = Object.fromEntries(arr);
console.log(obj); // { 0: "a", 1: "b", 2: "c" }
const arr = [
    ["0", "a"],
    ["1", "b"],
    ["2", "c"],
];
const obj = Object.fromEntries(arr);
console.log(obj); // { 0: "a", 1: "b", 2: "c" }
tring.prototype.matchAll
matchAll() 方法返回一个包含所有匹配正则表达式及分组捕获结果的迭代器。 在 matchAll 出现之前,通过在循环中调用 regexp.exec 来获取所有匹配项信息(regexp 需使用/g 标志:
const regexp = RegExp("foo*", "g");
const str = "table football, foosball";

while ((matches = regexp.exec(str)) !== null) {
    console.log(`Found ${matches[0]}. Next starts at ${regexp.lastIndex}.`);
    // expected output: "Found foo. Next starts at 9."
    // expected output: "Found foo. Next starts at 19."
}
如果使用 matchAll ,就可以不必使用 while 循环加 exec 方式(且正则表达式需使用/g 标志)。使用 matchAll 会得到一个迭代器的返回值,配合 for...of, array spread, or Array.from() 可以更方便实现功能:
const regexp = RegExp("foo*", "g");
const str = "table football, foosball";
let matches = str.matchAll(regexp);

for (const match of matches) {
    console.log(match);
}
// Array [ "foo" ]
// Array [ "foo" ]

// matches iterator is exhausted after the for..of iteration
// Call matchAll again to create a new iterator
matches = str.matchAll(regexp);

Array.from(matches, (m) => m[0]);
// Array [ "foo", "foo" ]
修改 catch 绑定
在 ES10 之前,我们必须通过语法为 catch 子句绑定异常变量,无论是否有必要。很多时候 catch 块是多余的。 ES10 提案使我们能够简单的把变量省略掉。之前是
try {
} catch (e) {}
try {
} catch (e) {}
现在
try {
} catch {}
try {
} catch {}
新的基本数据类型 BigInt
现在的基本数据类型(值类型)不止 5 种(ES6 之后是六种)了哦!加上 BigInt 一共有七种基本数据类型,分别是: String、Number、Boolean、Null、Undefined、Symbol、BigInt
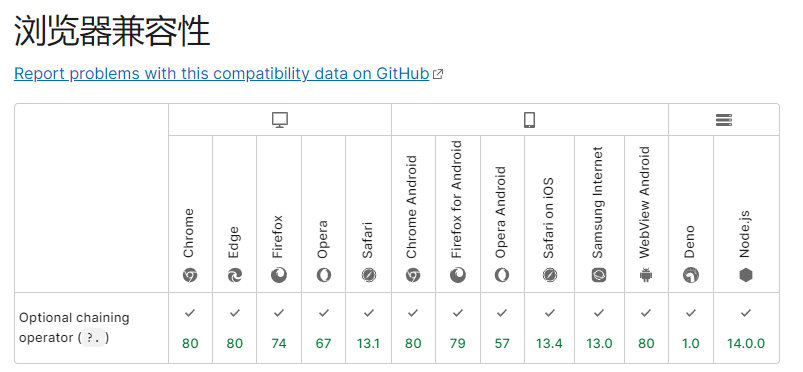
可选链操作符(Optional Chaining) ES2020
可选链 可让我们在查询具有多个层级的对象时,不再需要进行冗余的各种前置校验。 日常开发中,当需要访问嵌套在对象内部好几层的属性时,可能就会得到臭名昭著的错误 Uncaught TypeError: Cannot read property...,这种错误,让整段程序运行中止。
于是,你就要修改你的代码来处理来处理属性链中每一个可能的 undefined 对象,比如:
// let nestedProp = obj && obj.first && obj.first.second;
let nestedProp = obj?.first?.second;
// let nestedProp = obj && obj.first && obj.first.second;
let nestedProp = obj?.first?.second;
空值合并运算符(??)
一个逻辑运算符,当左侧的操作数为 null 或者 undefined 时,返回其右侧操作数,否则返回左侧操作数。
const foo = null ?? "default string";
console.log(foo);
// expected output: "default string"

const baz = 0 ?? 42;
console.log(baz);
// expected output: 0
const foo = null ?? "default string";
console.log(foo);
// expected output: "default string"

const baz = 0 ?? 42;
console.log(baz);
// expected output: 0
Promise.allSettled
我们知道 Promise.all 具有并发执行异步任务的能力。但它的最大问题就是如果参数中的任何一个 promise 为 reject 的话,则整个 Promise.all 调用会立即终止,并返回一个 reject 的新的 Promise 对象。
const promises = [
    Promise.resolve(1),
    Promise.resolve(2),
    Promise.reject("error"),
];

Promise.all(promises)
    .then((responses) => console.log(responses))
    .catch((e) => console.log(e)); // "error"
const promises = [
    Promise.resolve(1),
    Promise.resolve(2),
    Promise.reject("error"),
];

Promise.all(promises)
    .then((responses) => console.log(responses))
    .catch((e) => console.log(e)); // "error"
假如有这样的场景:一个页面有三个区域,分别对应三个独立的接口数据,使用 Promise.all 来并发请求三个接口,如果其中任意一个接口出现异常,状态是 reject,这会导致页面中该三个区域数据全都无法出来,这个状况我们是无法接受,Promise.allSettled 的出现就可以解决这个痛点:
Promise.allSettled([
    Promise.reject({ code: 500, msg: "服务异常" }),
    Promise.resolve({ code: 200, list: [] }),
    Promise.resolve({ code: 200, list: [] }),
]).then((res) => {
    console.log(res);
    /*
        0: {status: "rejected", reason: {…}}
        1: {status: "fulfilled", value: {…}}
        2: {status: "fulfilled", value: {…}}
    */
    // 过滤掉 rejected 状态,尽可能多的保证页面区域数据渲染
    RenderContent(
        res.filter((el) => {
            return el.status !== "rejected";
        })
    );
});
Promise.allSettled 跟 Promise.all 类似, 其参数接受一个 Promise 的数组, 返回一个新的 Promise, 唯一的不同在于, 它不会进行短路, 也就是说当 Promise 全部处理完成后,我们可以拿到每个 Promise 的状态, 而不管是否处理成功。 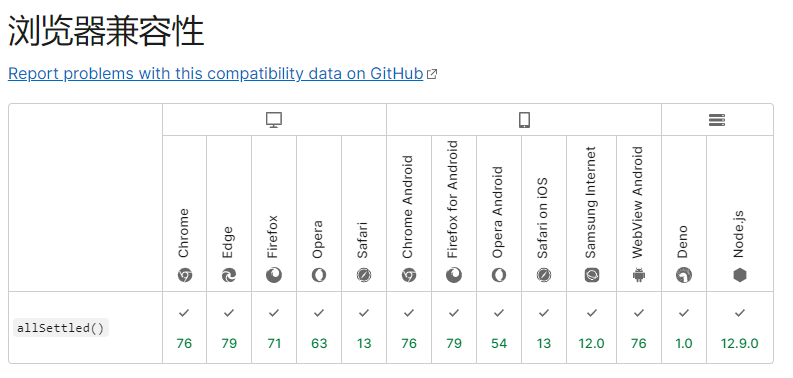
globalThis
globalThis 是一个全新的标准方法用来获取全局 this 。之前开发者会通过如下的一些方法获取:
- 全局变量 window:是一个经典的获取全局对象的方法。但是它在 Node.js 和 Web Workers 中并不能使用
- 全局变量 self:通常只在 Web Workers 和浏览器中生效。但是它不支持 Node.js。一些人会通过判断 self 是否存在识别代码是否运行在 Web Workers 和浏览器中
- 全局变量 global:只在 Node.js 中生效
过去获取全局对象,可通过一个全局函数:
// ES10之前的解决方案
const getGlobal = function () {
    if (typeof self !== "undefined") return self;
    if (typeof window !== "undefined") return window;
    if (typeof global !== "undefined") return global;
    throw new Error("unable to locate global object");
};

// ES10内置
globalThis.Array(0, 1, 2); // [0,1,2]

// 定义一个全局对象v = { value:true } ,ES10用如下方式定义
globalThis.v = { value: true };
而 globalThis 目的就是提供一种标准化方式访问全局对象,有了 globalThis 后,你可以在任意上下文,任意时刻都能获取到全局对象。
如果您在浏览器上,globalThis 将为 window,如果您在 Node 上,globalThis 则将为 global。因此,不再需要考虑不同的环境问题。
// worker.js
globalThis === self;
// node.js
globalThis === global;
// browser.js
globalThis === window;
// worker.js
globalThis === self;
// node.js
globalThis === global;
// browser.js
globalThis === window;
新提案也规定了,Object.prototype 必须在全局对象的原型链中。下面的代码在最新浏览器中已经会返回 true 了:
Object.prototype.isPrototypeOf(globalThis); // true
Object.prototype.isPrototypeOf(globalThis); // true

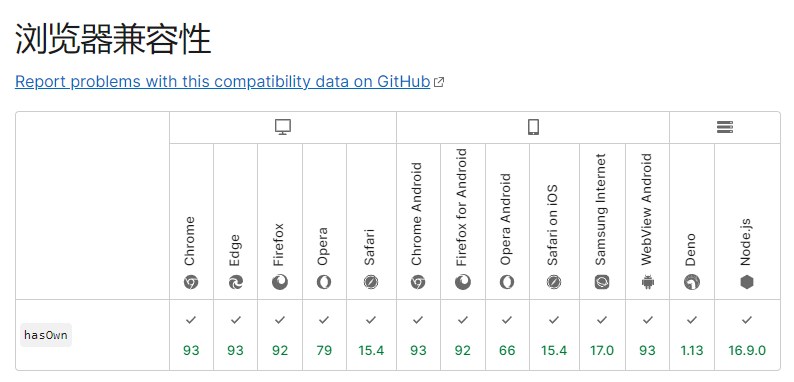
Object.hasOwn()
如果指定的对象自身有指定的属性,则静态方法 Object.hasOwn() 返回 true。如果属性是继承的或者不存在,该方法返回 false。
在 ES2022 之前,可以使用 Object.prototype.hasOwnProperty() 来检查一个属性是否属于对象。
Object.hasOwn 特性是一种更简洁、更可靠的检查属性是否直接设置在对象上的方法:
const example = {
    property: "123",
};

console.log(Object.prototype.hasOwnProperty.call(example, "property"));
console.log(Object.hasOwn(example, "property"));
const example = {
    property: "123",
};

console.log(Object.prototype.hasOwnProperty.call(example, "property"));
console.log(Object.hasOwn(example, "property"));
at()
at() 是一个数组方法,用于通过给定索引来获取数组元素。当给定索引为正时,这种新方法与使用括号表示法访问具有相同的行为。当给出负整数索引时,就会从数组的最后一项开始检索:
const array = [0, 1, 2, 3, 4, 5];

console.log(array[array.length - 1]); // 5
console.log(array.at(-1)); // 5

console.log(array[array.lenght - 2]); // 4
console.log(array.at(-2)); // 4
const array = [0, 1, 2, 3, 4, 5];

console.log(array[array.length - 1]); // 5
console.log(array.at(-1)); // 5

console.log(array[array.lenght - 2]); // 4
console.log(array.at(-2)); // 4
除了数组,字符串也可以使用 at()方法进行索引
const str = "hello world";

console.log(str[str.length - 1]); // d
console.log(str.at(-1)); // d
const str = "hello world";

console.log(str[str.length - 1]); // d
console.log(str.at(-1)); // d