Nest.js 教程
基本介绍
NestJS 是一个用于构建高效、可伸缩 Web 应用程序的 Node.js 框架,它基于 TypeScript 构建,使用了面向对象的编程思想和模块化的设计风格。NestJS 支持多种 Web 框架,包括 Express 和 Fastify 等,并提供了强大的依赖注入系统和模块化的架构设计,以帮助开发者构建可维护、可测试、可扩展的应用程序。
NestJS 的主要特点包括:
- 基于 TypeScript:NestJS 是完全基于 TypeScript 构建的,可以利用 TypeScript 的语言特性和类型系统来提高代码的可读性和可维护性。
- 模块化的架构设计:NestJS 的架构非常清晰,采用了模块化的设计思想,可以帮助开发者更好地组织代码和功能模块。
- 强大的依赖注入系统:NestJS 的依赖注入系统可以帮助开发者解耦代码,降低代码的复杂度,提高代码的可测试性和可维护性。
- 支持多种 Web 框架:NestJS 支持多种 Web 框架,包括 Express、Fastify 等,可以根据需求选择最适合的 Web 框架。
- 可扩展性强:NestJS 提供了一系列的扩展机制,包括中间件、过滤器、拦截器等,可以满足不同场景下的需求。
- 灵活的数据库集成:NestJS 支持多种数据库,包括 MySQL、PostgreSQL、MongoDB 等,可以根据需求选择最适合的数据库。
总之,NestJS 是一个功能强大、易于使用、灵活可扩展的 Node.js 框架,适用于构建复杂、可扩展的 Web 应用程序,特别是企业级应用程序。
项目搭建
TIP
请确保在您的操作系统上安装了 Node.js (>= 10.13.0,v13 除外)
npm i -g @nestjs/cli
nest new project-name
npm i -g @nestjs/cli
nest new project-name
项目创建后生成如下一个核心文件:
+-- src[目录] // 源文件/代码,程序员主要编写的目录
| +-- app.controller.spec.ts // 对于基本控制器的单元测试样例
| +-- app.controller.ts // 控制器文件,可以简单理解为路由文件
| +-- app.module.ts // 模块文件,在 NestJS 世界里主要操作的就是模块
| +-- app.service.ts // 服务文件,提供的服务文件,业务逻辑编写在这里
| +-- app.main.ts // 项目的入口文件,里边包括项目的主模块和监听端口号
打开 package.json 文件,可以看到下面的代码:
"start": "nest start",                              // 最常用的开始模式
"start:dev": "nest start --watch",                  // 开发模式的启动 有监视功能
"start:debug": "nest start --debug --watch",        // 调试Bug时的启动 调试程序时使用
"start": "nest start",                              // 最常用的开始模式
"start:dev": "nest start --watch",                  // 开发模式的启动 有监视功能
"start:debug": "nest start --debug --watch",        // 调试Bug时的启动 调试程序时使用
使用命令行进入到项目 cd nest-demo
然后再使用 npm run start 启动项目
看到下面的提示,说明我们的项目已经创建成功了。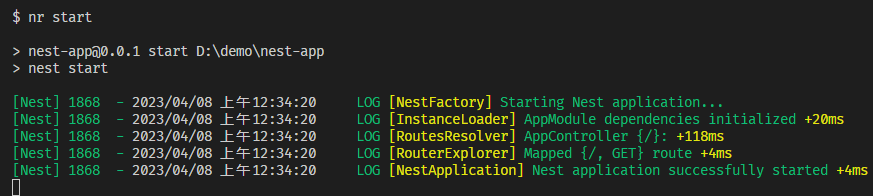
Controller 控制器-路由的创建
/src/app.controller.ts 是控制器,其实也就是编写路由。
新建一个路由/Controller
比如要新建一个 http://localhost:3000/jspang 的页面,访问时直接返回 Hello NestJS,这时候就可以在 app.controller.ts 文件里编写下面的代码。
import { Controller, Get } from '@nestjs/common';
import { AppService } from './app.service';

@Controller()
export class AppController {
    constructor(private readonly appService: AppService) {}

    @Get()
    getHello(): string {
        return this.appService.getHello();
    }
    //---------添加部分-----------
    @Get('JSpang')
    getJSpang(): string {
        return 'Hello NestJS.';
    }
    //---------------------------
}
编写完成后,就可以来到浏览器访问http://localhost:3000/jspang ,这时候你就可以看到你想要的结果了。